Learn how to correct your dimension assignments after posting in Microsoft Dynamics 365 Business Central to ensure the accuracy of your financial reporting.

If you discover that an incorrect dimension has been used on posted general ledger entries in Dynamics 365 Business Central, you can correct the dimension values and update your analysis views. This will help keep your financial reports and analyses accurate. Our step-by-step training article will walk you through how to make these changes easily.
Before we dive in, please note that the features for correcting dimensions are intended only to help make financial reporting accurate and that dimension corrections apply only to the G/L entries. They do not change the dimensions assigned to the entries in other ledgers for the same transaction. This means that there will be a mismatch between the dimensions assigned in the general ledger and the sub-ledgers, but this will help keep your financial reporting accurate.
Changing Dimension Assignments After Posting
On the Search for Page, enter General Ledger Entries.

Find the entry that you'd like to make a correction to. You can manually select one or more general ledger entries or use filters to select sets of entries. Select (highlight) the entry that requires correction and select Correct Dimensions.

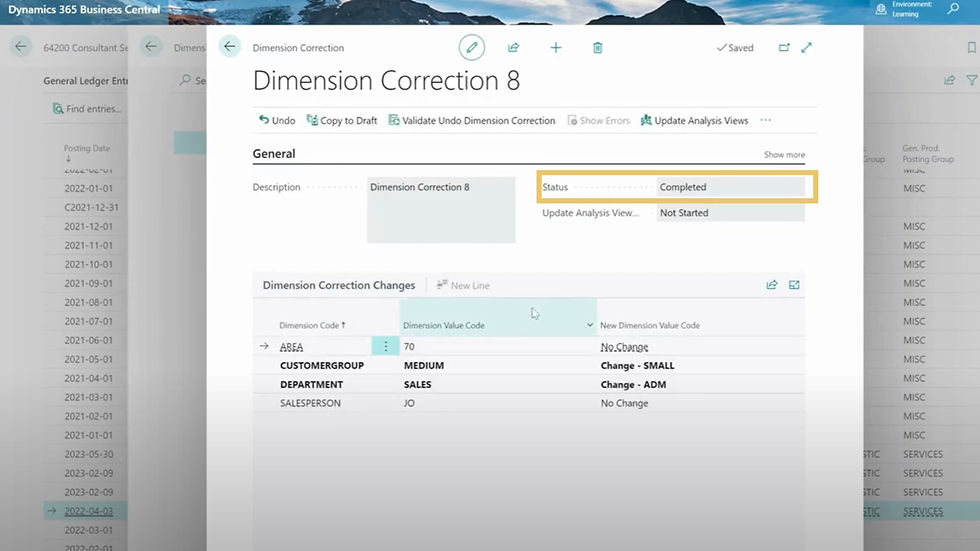
The Dimension Correction screen will open, and at the top, you can add a description and toggle on the Update Analysis Views to keep your financial reports and analyses accurate.

Select the New Dimension Value Code to make the change.

Once a change is made, you will see that the line font changes to bold. Select Run.

Toggle on the Run Immediately option, or you can set a scheduled time to run the change. Select OK to continue.

You will see a pop-up informing you that your dimension correction has been applied. Select OK to continue.

To verify the change, select History of Dimension Corrections for that entry to view the change.

It will show you that the changes were successfully made and what values were changed. When you're in your analysis views, you can update that view before running your analysis reports.

Training Video: How to Correct Dimensions in Dynamics 365 Business Central
Having trouble changing dimension assigments after posting in Dynamics 365 Business Central?
Feel free to get in touch with the team at Kwixand Solutions for expert assistance. Don't forget to subscribe to our YouTube channel for more Business Central training videos, and stay connected with us on LinkedIn, Facebook, and Instagram for the latest updates.
